PySide2
界面布局 Layout
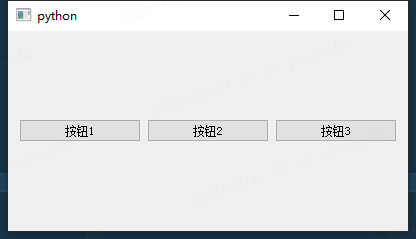
QHBoxLayout 水平布局
from PySide2 import QtWidgets


class Window(QtWidgets.QWidget):
    def __init__(self):
        super().__init__()

        button1 = QtWidgets.QPushButton('按钮1', self)
        button2 = QtWidgets.QPushButton('按钮2', self)
        button3 = QtWidgets.QPushButton('按钮3', self)

        # 创建layout对象,并且添加内部控件
        hl = QtWidgets.QHBoxLayout()
        hl.addWidget(button1)
        hl.addWidget(button2)
        hl.addWidget(button3)

        # 指定容器控件自身使用的layout
        self.setLayout(hl)


app = QtWidgets.QApplication()
window = Window()
window.resize(400, 200)
window.show()
app.exec_()
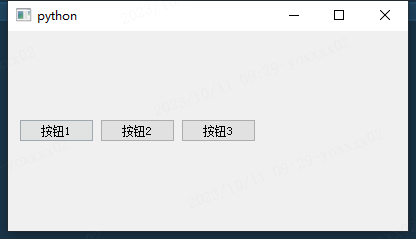
        # 剩余空间弹性布局
        hl.addStretch()
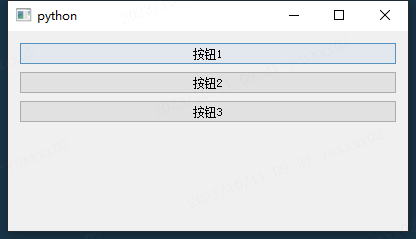
QVBoxLayout 垂直布局
from PySide2 import QtWidgets


class Window(QtWidgets.QWidget):
    def __init__(self):
        super().__init__()

        button1 = QtWidgets.QPushButton('按钮1', self)
        button2 = QtWidgets.QPushButton('按钮2', self)
        button3 = QtWidgets.QPushButton('按钮3', self)

        # 创建layout对象,并且添加内部控件
        vl = QtWidgets.QVBoxLayout()
        vl.addWidget(button1)
        vl.addWidget(button2)
        vl.addWidget(button3)
        vl.addStretch()

        # 指定容器控件自身使用的layout
        self.setLayout(vl)


app = QtWidgets.QApplication()
window = Window()
window.resize(400, 200)
window.show()
app.exec_()
QGridLayout 表格布局
from PySide2 import QtWidgets


class Window(QtWidgets.QWidget):
    def __init__(self):
        super().__init__()

        button1 = QtWidgets.QPushButton('按钮1', self)
        button2 = QtWidgets.QPushButton('按钮2', self)
        button3 = QtWidgets.QPushButton('按钮3', self)

        # 创建一个水平layout作为内部layout
        gl = QtWidgets.QGridLayout()
        gl.addWidget(button1, 0, 0)  # 添加到第1行,第1列
        gl.addWidget(button2, 0, 1)  # 添加到第1行,第2列
        gl.addWidget(button3, 1, 1)  # 添加到第2行,第2列

        # 指定自身使用的layout
        self.setLayout(gl)


app = QtWidgets.QApplication([])
window = Window()
window.resize(400, 200)
window.show()
app.exec_()

from PySide2 import QtWidgets
class Window(QtWidgets.QWidget):
def __init__(self):
super().__init__()
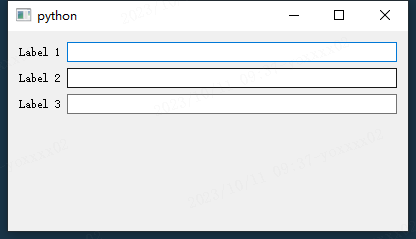
fl = QtWidgets.QFormLayout()
fl.addRow(QtWidgets.QLabel("Label 1"), QtWidgets.QLineEdit())
fl.addRow(QtWidgets.QLabel("Label 2"), QtWidgets.QLineEdit())
fl.addRow(QtWidgets.QLabel("Label 3"), QtWidgets.QLineEdit())
# 指定自身使用的layout
self.setLayout(fl)
app = QtWidgets.QApplication([])
window = Window()
window.resize(400, 200)
window.show()
app.exec_()
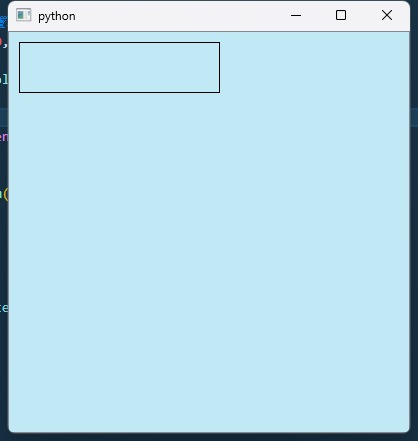
Graphic View
简单示例
- QGraphicsScene 画布
- QGraphicsView 展示层
- QGraphicsItem 元素, 控制层
from PySide2 import QtWidgets, QtGui

app = QtWidgets.QApplication()

# 创建 QGraphicsScene 对象, 设置位置和高度宽度
scene = QtWidgets.QGraphicsScene(0, 0, 400, 400)
# 设置背景色
scene.setBackgroundBrush(QtGui.QColor('#C1E9F5'))

# 创建 QGraphicsView 对象
view = QtWidgets.QGraphicsView(scene)

# 创建矩形对象
rect = QtWidgets.QGraphicsRectItem(10, 10, 200, 50)

# 添加到 QGraphicsScene 中
scene.addItem(rect)

# 允许移动
rect.setFlag(QtWidgets.QGraphicsItem.ItemIsMovable, True)

view.show()
app.exec_()
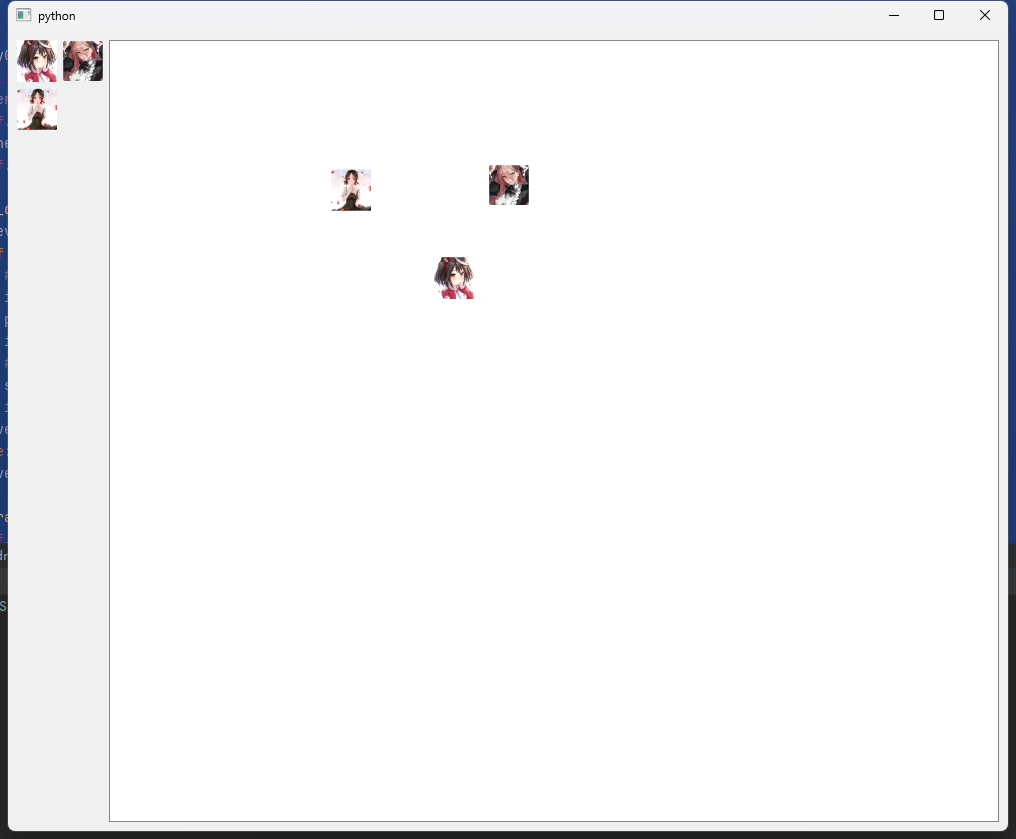
两侧布局并支持拖拽
from PySide2 import QtWidgets, QtGui, QtCore

PIC_LIST = ["1", "2", "3"]

WIDTH, HEIGHT = 1000, 800


class DraggableLabel(QtWidgets.QLabel):
  def __init__(self, parent=None, image_path=None):
    super(DraggableLabel, self).__init__(parent)
    # 加载图片
    pixmap = QtGui.QPixmap(image_path)
    # 设定图片缩放大小, 高度等比缩放
    pixmap = pixmap.scaledToWidth(40, QtCore.Qt.SmoothTransformation)
    # 设置label的图片
    self.setPixmap(pixmap)
    self.setAcceptDrops(True)  # 设置可接受拖拽

  def mousePressEvent(self, event):
    if event.button() == QtCore.Qt.LeftButton:
      # 创建拖拽对象
      drag = QtGui.QDrag(self)
      mime_data = QtCore.QMimeData()
      mime_data.setImageData(self.pixmap().toImage())  # 设置拖拽的图片数据
      drag.setMimeData(mime_data)
      drag.exec_(QtCore.Qt.CopyAction)


class MyGraphicsView(QtWidgets.QGraphicsView):
  def __init__(self, parent=None):
    super(MyGraphicsView, self).__init__(parent)
    self.setAcceptDrops(True)  # 设置可接受拖拽
    scene = QtWidgets.QGraphicsScene(0, 0, int(WIDTH * 0.8), int(HEIGHT * 0.8))
    self.setScene(scene)

  def __drag(self, action, event):
    if event.mimeData().hasImage():
      if action == "drop":
        # 在GraphicsView中显示拖拽的图片
        image = event.mimeData().imageData()
        pixmap = QtGui.QPixmap.fromImage(image)
        item = self.scene().addPixmap(pixmap)
        # 将坐标转换为场景坐标
        scene_pos = self.mapToScene(event.pos())
        item.setPos(scene_pos)
      event.accept()
    else:
      event.ignore()

  def dragEnterEvent(self, event):
    self.__drag("enter", event)

  def dragMoveEvent(self, event):
    self.__drag("move", event)

  def dropEvent(self, event):
    self.__drag("drop", event)


class MWindow(QtWidgets.QMainWindow):
  def __init__(self):
    super().__init__()
    self.resize(WIDTH, HEIGHT)
    centralWidget = QtWidgets.QWidget(self)
    self.setCentralWidget(centralWidget)
    # 设置水平布局
    self.mainLayout = QtWidgets.QHBoxLayout(centralWidget)
    self.setupLeftPane()  # 左边区域
    self.setupCanvas()  # 右边区域

  def setupLeftPane(self):
    gl = QtWidgets.QGridLayout()
    for index, name in enumerate(PIC_LIST):
      row, col = int(index / 2), index % 2
      label = DraggableLabel(image_path=f"./images/{name}.png")
      gl.addWidget(label, row, col)
    # 添加左侧的布局到主布局
    leftLayout = QtWidgets.QVBoxLayout()
    leftLayout.addLayout(gl)
    leftLayout.addStretch()
    self.mainLayout.addLayout(leftLayout)

  def setupCanvas(self):
    self.view = MyGraphicsView()
    # 添加绘制组件到主布局
    self.mainLayout.addWidget(self.view)


def main():
  app = QtWidgets.QApplication()
  # 对于显示器使用缩放图片的, 加上这一句使得图片不毛糙
  app.setHighDpiScaleFactorRoundingPolicy(QtCore.Qt.HighDpiScaleFactorRoundingPolicy.Round)
  window = MWindow()
  window.show()
  app.exec_()


if __name__ == '__main__':
  main()